When you arrive in a new harbor or cove and anchor or pick up a mooring, you have established a temporary waterfront residence. I like to think of your trawler as your home afloat, which means your tender is your car. Whether you are puttering around an anchorage in your dinghy to inspect the depths, casting your fishing rod, saying hello to other boaters or heading to shore to shop, dine or just stretch your legs, your personal water taxi is an essential conveyance.
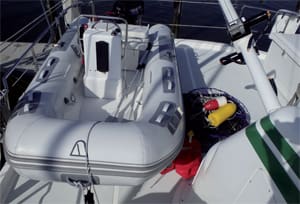
Tenders come in all shapes and sizes, and most trawler owners try to carry the largest size that will fit on their deck. This certainly makes for a roomier transport launch, but bigger is usually heavier and takes up more room. For many, an RIB (rigid inflatable boat) with Hypalon tubes seems to be the most popular choice. The inner hull component is constructed from fiberglass or aluminum with built-in seating and minor stowage. One advantage of an inflatable is that it is much more “forgiving” when resting alongside your hull — you bounce rather than crunch — but don’t overfill the tubes with air, as the heat from the sun will expand the material.
 |
|
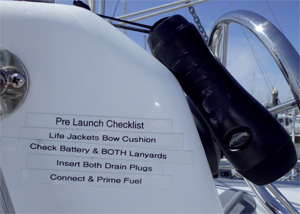
A checklist helps ensure a launch goes smoothly. |
Selecting the right tender for you is a bit of a politics/religion discussion, but you should consider your choices if you don’t already have one. Fiberglass hulls like Boston Whalers won’t puncture and can more universally beach with less potential damage on sharp, rocky shores. Overall size and total weight (dinghy and outboard) also matter. Your ultimate selection needs to combine comfort for operations (like a seated console with steering wheel vs. bench seat with tiller), with stability and durability. Whatever size you think you need, try to leave some “footprint” room on deck to be able to walk around for tying down the cover. If you have a little extra deck space, it’s easier to deploy and retrieve without banging your railings.
Launch and retrieval
The most difficult part of using your tender is when you launch and retrieve. If your trawler is set up with a mast and boom arrangement using block and tackle rigging or electric winches, you have to be very careful when your tender is in the air or when the boom swings your tender over the side of your hull as it is a lot of weight aloft and subject to the influence of the wind pressure and a hull that is rolling. Make sure that your line or wire cables are up to the load. An average 10-foot tender and outboard weighs several hundred pounds — not an easy cargo load to manhandle.
Prior to any deployment or recovery, you should inspect your lifting bridle — typically a three-point harness with one connection forward and two aft. I find it very important to also check the tender lifting points where they are affixed to the inner dinghy hull (that is a lot of force on each padeye) and prefer to see these attachments installed with appropriate backing plates.
 |
|
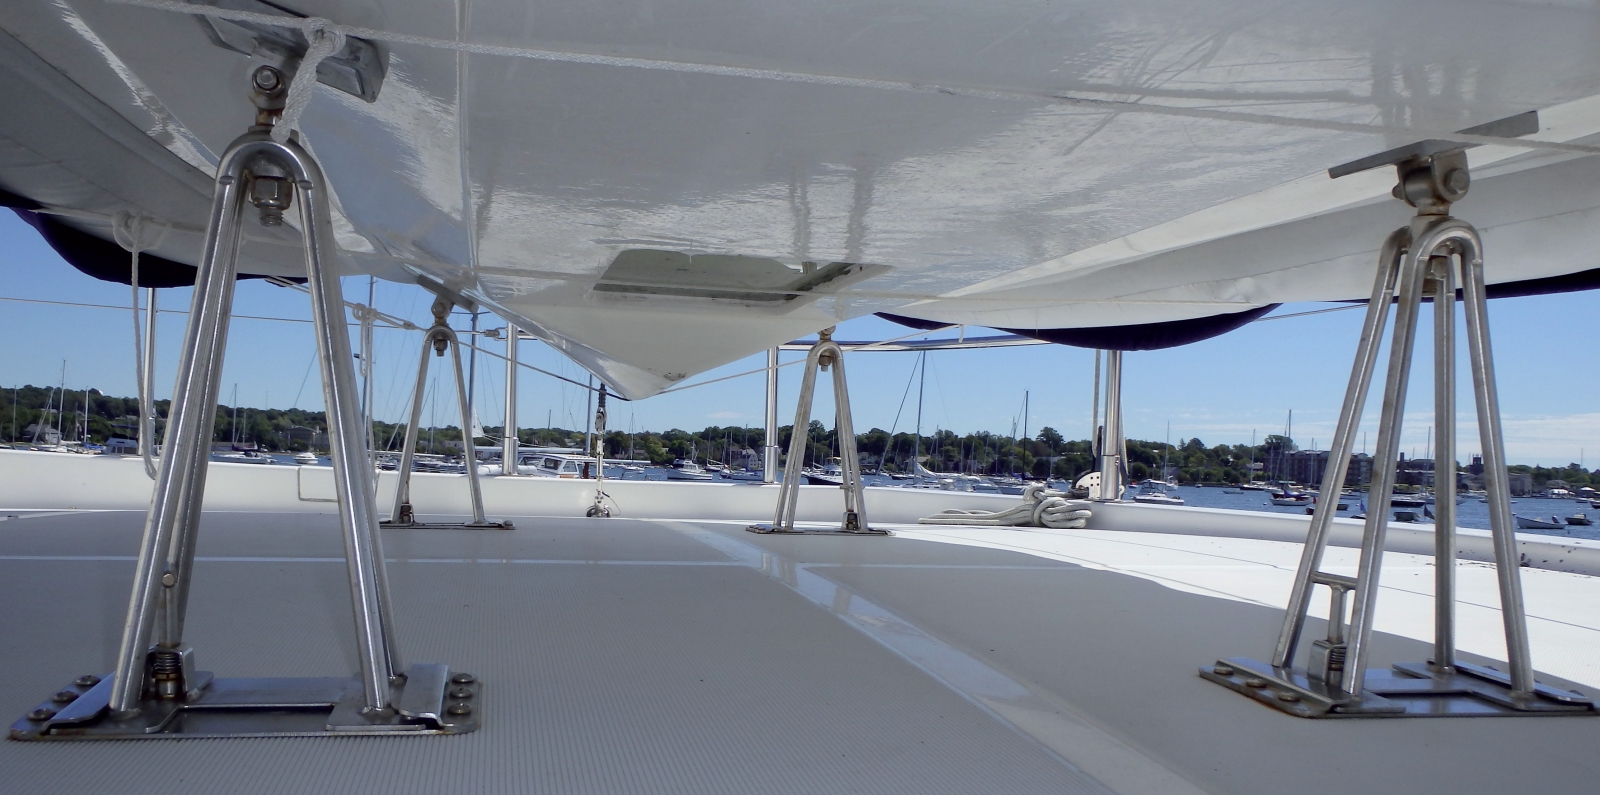
These supports keep the dinghy off the deck. |
The launch/retrieval drill works much smoother with two people managing the up/down and swing rotation. You need to keep an eye on the relationship between your tender and your railings, especially in clearing the outboard. I recommend using a length of line tied to the bow and stern (overall about double the length of the tender) that you can use as a control line to pivot the orientation of your tender short-handed to keep it from getting away from you. The control line can serve double-duty as an extra long painter fastened to the bow with an easily removed clip attached to the transom so that once you are in the water, you can simply unclip aft and then tie up to your trawler.
Prior to launching, be sure to make sure your drain plug is installed, battery is charged, fuel is on board and that you have life jackets, oars (in case your outboard sputters), a bilge pump, running lights and an anchor ready to deploy. You can type up some reminder labels as an at-a-glance check to make sure you are ready to go. Make sure you have a copy of your registration, a small tool kit and first-aid pack, and bring along a handheld GPS and VHF so you know where you are and can keep in touch with the mother ship.
The mounting of your tender on deck requires some careful thought to ensure it stays secure in rough seas. There is a wide variety of deck mounts available; select one that will cradle your tender and keep it from shifting or sliding. Tie downs also come in a variety of configurations, each providing different solutions. You need to make sure that your tender is locked in and can easily be released. Turnbuckles are popular, but the twisting bottle screws are not as easy to use; I prefer webbing straps with ratchets to cinch your boat down snugly.
 |
|
A handheld controller for the dinghy crane. |
Covers are necessary to help protect your tender from sun and rain, and a good cover can also convert your dinghy into an auxiliary on-deck storage locker. One great idea that is becoming more popular is to install a “rainbow” zipper in the cover that will provide you with a large opening to stow fenders, crab pots and other gear out of the way while you are traveling.
Four stroke outboards
Most outboard selections are four-stroke, very reliable and use gasoline. Gasoline can break down and get stale if it sits unused for extended periods of time, so make sure yours is fresh. The modern four-stroke outboards are easier to operate and more efficient because they don’t require engine pre-mix (50 fuel: 1 oil) like the old two-strokes. Safely store your gasoline tank in the dinghy, and keep in mind you will need to refill your tank occasionally. Prime with the squeeze bulb and pull out the choke (some four strokes have automatic chokes) to get your outboard fired up, give it some revs and look for the cooling water discharge stream to make sure you don’t overheat.
Modern outboards have a emergency “kill switch” that attaches via an ignition clip around the hub of the key and is connected to you with a lanyard so that if you fall overboard, the outboard will automatically stop running (presuming of course that you clip the lanyard to yourself which is the safety intent of this system). This is a nice safety feature that is something you need to remember, as you can’t start the outboard if the ignition clip isn’t inserted.
 |
|
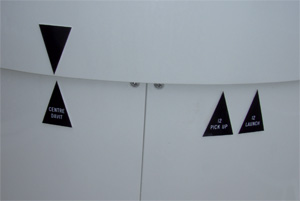
Marks help the crane operator get the crane lined up properly. |
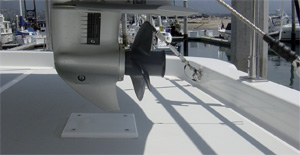
Many trawler owners will install a “skid pad” below the skeg of the outboard to prevent damage to the deck and bottom end of the outboard.
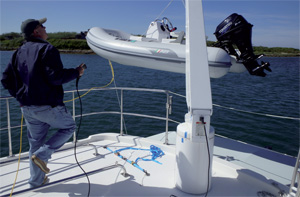
Larger trawlers will use a crane to control launching. Cranes are much easier to operate since a single handheld controller (typically with a long reach cable so you can move around) operates the boom lift, boom rotation and the “yo-yo” hoist feature (the up-and-down line control) that is attached to your dinghy bridle for raising and lowering. Some even have extension features to increase their reach.
A smart spare part to buy is a back-up handheld controller and cable to operate your winches or crane. The only thing worse than having a faulty or broken controller with your dinghy ready to launch is having your tender already in the water and not being able to get it back aboard.
I’ve seen several trawler owners mark their dinghy hulls with tape or paint bands as reference guides to help settle their tender back in the best fore/aft positioning on the deck chocks. Another smart trick is to mark your crane in the “ready” orientation before you launch so that you can easily reference the optimum positioning for returning your tender to its designed mounting location.
Similarly, you can mark the boom lines with a permanent ink Sharpie pen, or the boom wires with tufts of yarn as a visual reminder when you are at your optimum starting and ending positions.
 |
|
An outboard skid pad protects the deck from getting mared by the outboard’s lower unit. |
Towing the tender
If you will be moving your trawler to a nearby cove, it’s a lot easier to tow your tender than it is to get it back up on deck. Plan for this with a harness line attached in your port and starboard outboard transom corners. I like to see a block (pulley) attaching the towline to the harness line so that the load is evenly distributed across the harness as you make turns. Towing should be thought out in advance, and using floating polypropylene line will help prevent your towline from being wrapped up in your propellers.
Many smaller trawlers have installed some nice snap davits, hinged connections on their swim platforms that allow for vertically storing their tenders on their transoms.
When you have your tender back up on deck and out of the drink, don’t forget to flush out your outboard with fresh water to clean out any salt water.
Pick a calm day when you have some free time to go through these suggestions and you should be able to simplify your tender tendencies. With some practice, you will improve your techniques to make tender launching, retrieval and storage a less stressful and more welcome task that will encourage you to take your launch out to explore and enjoy.
Jeff Merrill, CPYB, is the president of Jeff Merrill Yacht Sales, Inc.www.JMYS.com. Merrill is a veteran yacht broker who provides worldwide professional representation to buyers and sellers of premium brand, oceangoing trawlers. Merrill is active in the cruising community as a public speaker and boating writer and enjoys spending time at sea with clients. Jeff has written several “Dialing-In Your Trawler” articles for Ocean Navigator and is always looking for new ideas to improve and simplify the trawler lifestyle. If you want to get in touch, please e-mail him directly: trawlerspecialist@gmail.com.